Waxing Painted timber surfaces
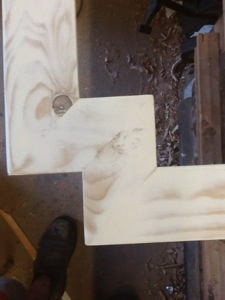
I recently completed a notice board for my daughter to hang her copious amounts of drawings and general tweenage girl stuff. The board is big, measuring around 1 metre by 1 metre and features offset corners for a bit of added interest.
I knew from the beginning that the piece would end up being painted so instead of using stock from the premium rack I had a fossick and ended making the noticeboard frame from some long offcuts of 90 x 35 framing pine that I had in the workshop. The idea of using bog standard timber to create a high-end decorative piece has always intrigued me, and I was looking forward to the challenge of seeing how good I could make this pedestrian timber end up looking.
When the frame was complete I filled all the imperfections and sanded the entire frame up to 1500 grit. I used the interface pad described in part 1 to ensure that I didn’t flatten any of the rounded edges on the piece.
When all the sanding was complete, I gave the entire frame its first coat of paint. The paint I used was the leftover acrylic matt ceiling paint that I used when painting my daughter’s room. The colour was tinted to a light ivory tone which gave the piece a nice warm feel.
You may be wondering why I used matt paint? Well, firstly, I had it, and I suppose I was being a bit of a cheapskate and didn’t want to buy more paint and secondly, the flat surface of the paint provided an excellent key for the wax finish.
When the first coat had had a full 24 hrs drying time I gave it a sand with 800g Vlies abrasive to de-nib the surface and prepare it for the next layer. It is important to sand slowly with minimal pressure and had the sander set to speed 1 in the Rotex mode. We need to avoid building excess heat which can affect the paint surface.
I always use Vlies during this stage of the process as it is a soft abrasive which minimises the risk of sanding through the paint surface and it gives a beautiful finish.
Clean off any excess dust then repeat the process until you’ve got at least 4 coats of paint on the frame.
When the final coat of paint is dry, sand the entire surface with 1500 grit Titan remembering to use an interface pad if required.
Wipe all surfaces to remove excess dust, then grab your can of Gilly Stephenson’s cabinet makers wax and use a soft, clean cloth to apply a thin coat to one side of the frame. Do one side at a time to ensure that the wax doesn’t set or get sticky. Put a sheet of 1500 grit Titan paper on the sander and on speed 1 in the Rotex mode, begin to gradually work the wax into the paint surface. Once the first side is done repeat the process with each of the sides until the frame is done. When you’ve completed this stage place a paper napkin on the surface then, place your sander on it and with speed set to 1, in Rotex mode, burnish the entire furnace of the piece.
The wax burnishing process described above is taken from my earlier article, “How to get the most from your Rotex” and is an excellent method to achieve a high-grade wax finish.
I’ve recently been experimenting with the white ‘Vlies’ pads which are an excellent substitute for the paper towel. While the paper towel method is certainly cheaper, still, suggest you get one or two from your local Festool dealer and try them out for yourself.
Repeat the process to build up the finish until you’ve either had enough or have reached a level of finish you like. For my work, I find that around 3 to 4 coats are sufficient but see hoe you go and stop when you’re happy with the finish.
There’s a lot of scope for experimentation with this finish so don’t be afraid to play!!
As always, thanks for reading, be safe and have fun.
Cheers
Bryan


I will immediately snatch your rss as I can’t in finding your e-mail
subscription link or e-newsletter service. Do you’ve any? Please allow me
recognise so that I could subscribe. Thanks.
My brother recommended I might like this blog. He was totally
right. This put up truly made my day. You can not imagine simply how much time I had spent for this information!
Thanks!
Hi to all, how is all, I think every one is getting more from this web site, and your views are pleasant
for new people.
Pretty! This has been an extremely wonderful article. Thanks for providing these details.
Hey there! I’m at work surfing around your blog from my new
iphone! Just wanted to say I love reading your blog and look forward
to all your posts! Carry on the great work!