ETS EC 150 Festool Brushless Sanders

Hi All,

Recently released in Europe Festool’s new  sanders the ETS EC 150/5 and ETS 150/3 are sure to be a hit when they reach the Australian market. With the latest in EC brushless motors these sanders have a host of new features to make the onerous task of sanding quicker and easier.

images

Some of the new features are a vibration sensor which automatically adjusts the sander speed when not under load to protect the user from excess vibration, constant speed under load, and a suction detection system which stops the sander if the dust extractor hose comes out, (this feature can be deactivated if you’re using a dust bag).

The new sanders have a height of 113mm including pad, compared to 185mm on the old ETS sanders and a weight of 1.2 kg which is 600 grams lighter than the old ETS sanders

Have a look at the video below to see the ETS EC 150 in action and watch for a cameo appearance by Blair, one of the principals  of Festool Australia

Please watch this space and as more information comes to hand I’ll post it here

Be safe and have fun

Cheers

Bryan

Waxing Painted Timber Surfaces

20130302-140934.jpg

Waxing Painted timber surfaces

I recently completed a notice board for my daughter to hang her copious amounts of drawings and general tweenage girl stuff. The board is big, measuring around 1 metre by 1 metre and features offset corners for a bit of added interest.
I knew from the beginning that the piece would end up being painted so instead of using stock from the premium rack I had a fossick and ended making the noticeboard frame from some long offcuts of 90 x 35 framing pine that I had in the workshop. The idea of using bog standard timber to create a high-end decorative piece has always intrigued me, and I was looking forward to the challenge of seeing how good I could make this pedestrian timber end up looking.
When the frame was complete I filled all the imperfections and sanded the entire frame up to 1500 grit. I used the interface pad described in part 1 to ensure that I didn’t flatten any of the rounded edges on the piece.

When all the sanding was complete, I gave the entire frame its first coat of paint. The paint I used was the leftover acrylic matt ceiling paint that I used when painting my daughter’s room. The colour was tinted to a light ivory tone which gave the piece a nice warm feel.

You may be wondering why I used matt paint? Well, firstly, I had it, and I suppose I was being a bit of a cheapskate and didn’t want to buy more paint and secondly, the flat surface of the paint provided an excellent key for the wax finish.

When the first coat had had a full 24 hrs drying time I gave it a sand with 800g Vlies abrasive to de-nib the surface and prepare it for the next layer. It is important to sand slowly with minimal pressure and had the sander set to speed 1 in the Rotex mode. We need to avoid building excess heat which can affect the paint surface.
I always use Vlies during this stage of the process as it is a soft abrasive which minimises the risk of sanding through the paint surface and it gives a beautiful finish.
Clean off any excess dust then repeat the process until you’ve got at least 4 coats of paint on the frame.
When the final coat of paint is dry, sand the entire surface with 1500 grit Titan remembering to use an interface pad if required.
Wipe all surfaces to remove excess dust, then grab your can of Gilly Stephenson’s cabinet makers wax and use a soft, clean cloth to apply a thin coat to one side of the frame. Do one side at a time to ensure that the wax doesn’t set or get sticky. Put a sheet of 1500 grit Titan paper on the sander and on speed 1 in the Rotex mode, begin to gradually work the wax into the paint surface. Once the first side is done repeat the process with each of the sides until the frame is done. When you’ve completed this stage place a paper napkin on the surface then, place your sander on it and with speed set to 1, in Rotex mode, burnish the entire furnace of the piece.
The wax burnishing process described above is taken from my earlier article, “How to get the most from your Rotex” and is an excellent method to achieve a high-grade wax finish.
I’ve recently been experimenting with the white ‘Vlies’ pads which are an excellent substitute for the paper towel. While the paper towel method is certainly cheaper, still, suggest you get one or two from your local Festool dealer and try them out for yourself.

Repeat the process to build up the finish until you’ve either had enough or have reached a level of finish you like. For my work, I find that around 3 to 4 coats are sufficient but see hoe you go and stop when you’re happy with the finish.

There’s a lot of scope for experimentation with this finish so don’t be afraid to play!!

As always, thanks for reading, be safe and have fun.

Cheers

Bryan

20130302-141405.jpg

20130302-141023.jpg

20130302-141204.jpg

Festool Hand Sanding Pad


Hand sanding pad

For those occasions when an electric sander is too aggressive or when you’re sanding delicate materials such as small mouldings, the hand sanding pad, (Festool part # 495966) is an absolute gem.

The pad features a Velcro backing which wraps around the piece and easily accepts all styles of 150mm diameter abrasives. I’ve teamed it up with the new series of Granat papers to sand small timber mouldings up to 1500 grit for a project I’m working on and have been extremely satisfied with the results to date.

Available as either a hard or soft pad and selling for under $40.00 they’re a worthwhile addition to your sanding kit.

As always, your questions and comments are appreciated

Be safe and have fun,

Cheers

Bryan

Rotex + Granat + Marble = Wow

Hi Guys,

festool granat abrasive

I apologise for it being quite a while since I updated the site, but I’ve been busy behind the scenes working on an upcoming book on trammel routing and an E-book on the Rotex. Today’s post is all about the new Festool Paper “Granat” which would have hit the shelves at your local Festool dealer a few months ago.  I hadn’t had a lot of time to test it until an opportunity presented itself recently where a client of mine had a problem with some marble that needed some love and Granat proved the perfect solution.

Read the full article with the technique on how to polish stone with Granat here.

This new hybrid abrasive is impressive and I’ve found that it lasts nearly twice as long as Brilliant and Rubin on timber, Corian and stone.

Have a read and let me know what you think.

As usual, your questions and comments are appreciated.


Be safe and have fun,

Cheers

Bryan


Tiny Things

I had to reblog Stu’s post. This is an awesome piece of work and shows what can be done when you really push woodworking to its limits.

For more out of this world carving have a look at miracle chicken miniatures here.
Be inspired and have fun
Cheers
Bryan

Stu's Shed

Seems to me these days, that not only am I burning the candle at both ends, but I’ve somehow had to light it in the middle as well. I need to get it under control again soon: it is unsustainable, and my post quality and quantity recently is a direct reflection of that.

In the meantime, as a seque back to what I wanted to show: found this image recently, don’t have any detail about it at all unfortunately. But if you are burning the midnight oil, or burning the candle at both ends, you could use one of these to ignite it

20120301-005544.jpg

Cool huh!

View original post

A Cautionary Tale..

I’m a major fan of Christopher Schwartz’s, lost art press blog and was amused, if that’s the correct word, to read of his nasty encounter with black walnut, (see, The Nasty Nut).
It reminded me of how I developed a healthy distrust of white and red cedar.

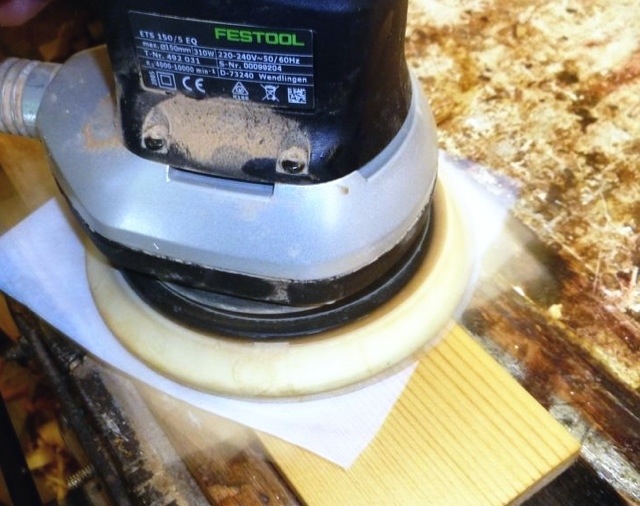
It happened back in September 2008 whilst I was working at the working wood show in Canberra. After discussions with the dealer we were doing the show with, our focus for this event was demonstrating the new Vac Sys vacuum clamp system as well as the Rotex and ETS sanders.
From previous shows i’d done earlier in the year I found the the best way to demonstrate the Vac Sys was to fix the Vac Sys to a MFT 3 table then put a slab of timber, borrowed from one of the timber merchants at the show, then use the rotex to sand and polish the slab to a mirror finish. ( See blog on “how to get the most from your rotex” for the technique)
It was a mutually beneficial arrangement as we had a continuous supply of timber to demonstrate on and the timber merchant got a finished slab he could sell for a higher price.
Well, once the test centre stand was set up I went to explore the timber area and soon met up with the boys from Cedarworks in NSW who agreed to let me use their timber. I’d never used this technique on cedar before and was interested in how it would work.
The show began on the Friday which was a blur of sanded boards, and demonstrations. The cedar finished beautifully using the rotex though as the day progressed I found that the 1200 and 1500 grit titan abrasives used in the final stages of the demonstrations weren’t lasting as long as they normally did with hardwoods.

Should’ve paid a bit more attention to this.

Saturday again passed quickly with more boards polished and plenty of sander sales. Started to feel a bit funky that night with my left eye now beginning to feel decidedly gritty and starting to look a bit bloodshot.

Also should of paid more attention to this!

Woke up Sunday morning feeling, well, decidedly crook, with the left eye leaking green goo and the right eye turning a bit red.
I gathered my self together and figured that as my flight home was booked for Sunday night and I’d have no hope of getting home earlier, I may as well go to the venue and do the rest of the show.
Well, you know how when you’ve got commitments to fulfill and you psych yourself up; I did all that and was not feeling too bad when I left the hotel and got to the venue. The eyes were a bit blurry but I could deal with that.
My efforts in talking myself up were rendered futile when I arrived at the venue and was confronted by colleagues, and the dealer staff whose comments of, ” what happened to your eyes” and “Oh you look terrible” really helped to make me feel better.
Anyway, I managed through the rest of the show, packed up and got to the airport to find my plane was delayed for an hour.

This weekend just keeps getting better!!!!

Went to the bathroom to check things out before I got on the plane and was a bit surprised at how revolting I looked. Both eyes were now really bloodshot and leaking green goo.
It now made sense why everyone had been giving me a wide berth at the airport.
I tried to make myself a bit more presentable, then after about another half an hour, got to my seat on the plane.
Got myself comfortable, then was tapped on the shoulder by the hostie who wanted to check if I had seatbelt on. She took one look at me, her smile disappeared then she hurried off to get the cabin supervisor.
After reassuring them I was well enough to fly I eventually got back to Melbourne and managed, more by good luck than good management to drive myself home.

Just after midnight I walked in the front door at home and was greeted with a horrified expression on my wife’s face,( that’s never good). Both eyes were now oozing copious amounts of green goo, were swollen, bloodshot and bleeding from the corners.

My lovely wife grabbed her keys and took me straight to the eye and ear hospital in the city.
After a few hours of tests the verdict was that I had developed a severe bacterial infection from the fine cedar dust which had also scratched both eyes.

The end result was 2 weeks off work with bucket loads of eye drops. I was fortunate to make a full recovery but I’m very aware that things could have been a lot worse.

So what happened.
Well, during my two week recuperation I has a good deal of time to go through the events and see if I figure out where the weekend went pear shaped.
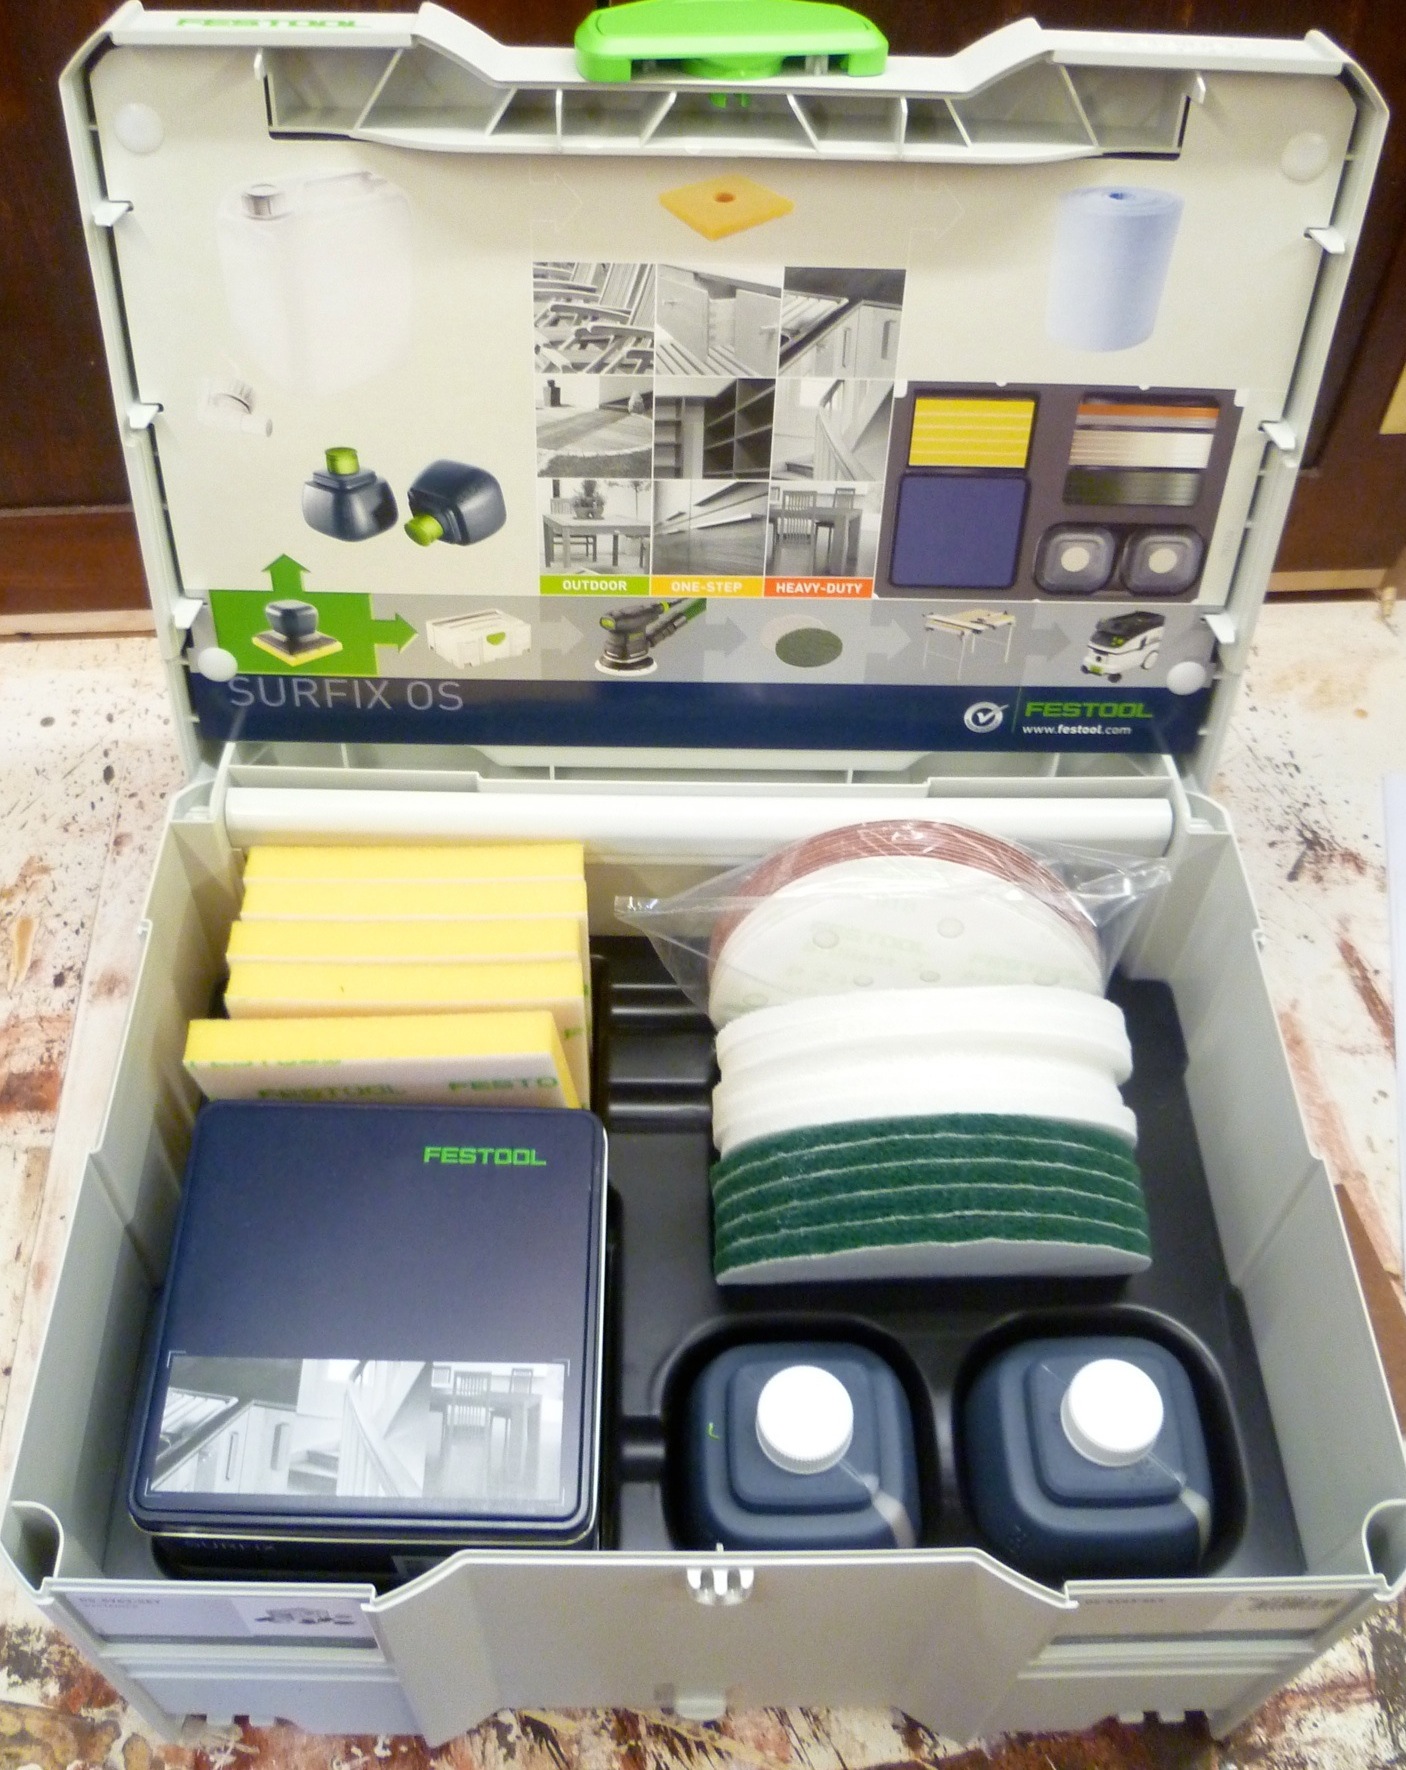
I performed all demonstrations with full dust collection which collected pretty well everything until I hit the 1200 grit and 1500 grit Titan papers. When you sand above 400 grit the swarf you make is classified as “flour” rather than dust. The finer the grit the finer flour. One of the characteristics of Titan papers is that over 1200 grit there are no holes for dust collection. So the flour I was creating was staying on my hands which I then transferred to my eyes when I inadvertently wiped my eye or touched my face.
The problem was compounded by sanding cedar slabs for almost three solid days.
My doctor also advised me at a later appointment that under magnification they found that the particles of cedar flour they had examined were quite sharp rather than being rounded like most timber flour. This probably also explains why my papers weren’t lasting along.

I leant my lesson here and during later demonstrations had a tack cloth handy to contain the flour when sanding above 1200 and I also had a bucket of water handy to rinse my hands in to remove any residue of the flour.

I still work with cedar, albeit a lot more carefully and I’ve had no further problems.

Anyway everyone; have fun and work safe.

Cheers

Bryan

The Festool Surfix Oiler System, (Part 2)

20120111-065458.jpg

A wet oil finish with an Ets 150/5

The Festool surfix oiler system, part 2

In the previous article on the new Festool oil system I produced a set of samples in both hardwood and softwood to see how easy it was to use the new oil system when following the instructions provided with the kit. Whilst the application method worked I wasn’t happy with having to leave the project for 8 hours between coats, so I thought I’d try the Festool oils using the wet burnishing method which I’ve used extensively with other oil finishes to see how good a finish would result.

For this test I’ll again be turning to my Ets 150/5 sander and the timber I’m using will be Sydney Blue gum for the hardwood sample and Baltic pine for the softwood.

The blue gum is recycled flooring and had already been sanded to about 120 g but the Baltic I have is in rough sawn boards; so once I’d dressed the Baltic,( by hand !) I was ready to begin.
In the Festool method that I wrote about in the previous blog, the samples were only sanded to 320g.
In the wet burnishing method we’ll be using both Festool Brilliant 2 and Titan papers and sanding up to 1500g. To achieve the best finish, It’s very important to remember the basic sanding rules relating to sander speed and grit size when using this method.
Use the table below as a guide to help select the appropriate speed for the grit your using.


Brilliant 2 Abrasives

Grit: Speed:
40. 6

60. 6

80. 6

120. 5

150. 5

180. 5

240. 4

320. 4

400. 3


Titan Abrasives
Grit: Speed:
500. 3

800. 2

1000. 2

1200. 1

1500 & finer 1


This chart is a suggested range only and results can vary depending on the type of timber that you’re using for your project.
If your using a Rotex sander remember to use the Rotex, random orbital technique as described in the “How do I get the best from my Rotex” article which is listed on the main page of this blog. If your using an ETS sander just work carefully though the progressive grades of paper paying close attention to the speed settings on the sander.

Once you’ve reached 1200 grit stop, as now we’re going to apply our first coat of oil. It you haven’t read my previous article on using the Festool oiler system, I’d suggest that you pause here and go back and have a look at it, particularly the section on loading and using the applicator pad.
Once you’ve chosen your oil and have the applicator pad set up apply an even coat of oil to the work piece. Try not to get too heavy a coat as repeated thin applications will give you a far better result than thick coats.
Once applied leave it for no more that 15 minutes then grab your sander with the sheet of 1500 grit Titan paper on it and , with the speed set to 1, begin to sand the surface of the work piece, gently and evenly working the oil into the timber. The small amount of heat generated by this process will open the pore of the timber allowing the oil to penetrate.
Work the oil into the timber for about 5 minutes ensuring that you cover all areas on the workpiece.
Once you’ve done this place a paper napkin on the workpiece, place your sander on top of the napkin, (don’t remove the abrasive) check that the sander is still on speed 1,then gently polish the entire surface of the workpiece. The napkin serves a twofold purpose in this technique. The abrasive properties of the napkin are around 6000 grit which serves to gently burnish the surface whilst the paper absorbs any excess oil from the work.
Put the piece aside for about an hour to give the oil more of a chance to dry then repeat the process from the oil application step, until you’ve achieved the level of finish you’re after.
I’d recommend a minimum of four coats of oil to achieve a good degree of protection , though the more coats you do, the better the final result.
Be sure to leave at least 24 hrs after application of the final coat of oil and give it a final buff using your sander and a paper napkin before you use your piece.

Safety note: Handle all materials with due care and be sure to clean up your work area and wash your hands properly when you have finished using these products. There is always a risk of spontaneous combustion of rags used in oil finishes if not stored correctly. Soak and rags used in water then dispose of in a bin outside your workshop when you’ve finished for the day.
Use all relevant personal protection equipment, ( safety glasses, hearing protection, etc) when using any of the techniques listed on this website.
Work safe, Have fun.

I hope you enjoyed this article and as usual, your comments and questions are always appreciated.

The next series of articles I’ll be posting will cover a the things you need to know about routers

Cheers

Bryan

The New Festool Oiling System


Festool Oiling System

Hi Guys,

I’ve finally had a chance to have a play with the new Festool Surfix  Oiling System  and I must admit that I was very happy with the result.  It’s perfect for the serious DIY user to get a taste of  traditional oil finishes and I’m certain the quality of the finish will appeal to more seasoned woodies.

If you follow the link above it will take you to the PDF handout I wrote which breaks down Festool’s “unique” instructions into a more user friendly format.

I tested the oils on Baltic Pine and Redgum using both the Festool method which recommends leaving the oils to sit on the workpiece for 6 to 8 hours, and my own method in which I sand up to 1500 grit with an ETS 150/5 , then wet burnish in the oil.

If you want more info on wet burnishing oil finishes either place a comment or send me an email and I’ll write a post detailing the method.

As always your comments are appreciated.

Cheers for now

Bryan


A Tung Oil Finish

20111116-142817.jpg

Gid’day all,

Having completed the construction of the shelves and doors for wall unit that I’m building I was faced with the question of how I was going to finish them. From previous articles you’ll know that I’m not a fan of varnishes and lacquers and that I love natural wax or oil finishes. My first thought was to go for a hard burnished wax finish as I detailed in the Rotex article, but the thought of having to apply 4 coats of wax on 12 shelves and 6 doors was a bit daunting and would add another couple of weeks to a project which was already behind schedule.

For quality of finish and speed of application I decided to go for a tung oil finish. Now from experience I’ve found that there is quite a lot of variations of usability between the different brands of tung oil out there. I’ve tried a number of them an found that Haymes tung oil gives me the best, most consistent and repeatable result for the way that I work. When dry the tung oil gives a low sheen finish which is easy to care for and really brings out the character of recycled timbers.

In this article we’re going to use what I call a “dry” oil finish, as we’ll let the oil surfaces dry completely before sanding them. A “wet” oil finish is where the oil is worked into the surface with a sander at low speed whilst still wet.
I would recommend the dry method with the Haymes tung oil due to the high polymer content in the oil. If you’re wet sanding with this oil it can become very sticky, very quickly which will completely bugger up the finish your trying to achieve.
The “wet” oil technique is best left for natural or wax rich oils such as the oils in the new Festool surfix oiling system which will be covered in an upcoming article

The first stage in finishing was to sand the doors and shelves to 1200 grit. I find that when applying oil finishes such as the Haynes tung oil, which are particularly rich in polymers, the finer the surface you have to begin with, the easier the finish will be to apply, and the better the end result will be.

I sanded all the timber surfaces and edges with my Ets 150 sander. I used a Festool sander for this project because I have one, but you can achieve the same result with almost any variable speed random orbit sander.
Begin at 80 grit then move to 120, 180, 240, 320, 400, 800, finishing at 1200 again. Remember to adjust the speed of the sander as your moving through the grades of paper to achieve the best results.
Once all the surfaces were sanded to 1200, I applied the first coat of oil to the first side of all the pieces. My preferred method of application is to wipe the oil on using a pad made from a soft cotton cloth. I find that get virtually no drips and a more even coverage.
The pieces were left for 24 hours to dry, then flipped over and the reverse sides were given there first coats.
After another 24 hours drying time I put a piece of 1500 grit paper on my ETS sander and with the speed on 1, sanded all surfaces in preparation for the 2nd coat. I always have a paintbrush handy to dash away the excess dust created by the fine sanding.
The next step is to apply the second coat of oil following the same process that was used when applying the first coat.

It’s important that you sand between coats to give the new coat the best chance possible to stick to the previous coat. Be sure to remove the excess dust before application of the new coat.
As I said earlier, the Hayes tung oil has a lot of polymers in it which can give the surface quite a high gloss. This was a bit shiny for me so once all the surfaces had at least 72 hrs drying time I cut the finish back with 1500 grit paper, then burnished the surfaces with a brown paper bag places between the sander and the workpiece. This may sound a bit odd, but trust me, it gives the finish a really nice luster.
If your going to use this technique, just remember not to exceed speed 1 on your sander.
When completed this wall unit will get fairly regular use so for maximum protection I gave all of the woodwork four coats of the tung oil.

Anyway, that’s all for today so keep on woodworking. If you end up using this technique, drop me an email or better still, send me a photo and I’ll put it up on the site so we can all see how you got on.

As usual, your comments and emails are appreciated.

Cheers

Bryan

20111116-142831.jpg

How to get the most from your Rotex, (Part 2)

A Hard Burnished Wax Finish.

To protect and preserve the work, I usually apply a wax finish to the piece. I’m not a fan of varnish or lacquer style finishes as I feel they can give the finished piece a “plastic” sort of look when they’re completed.

The wax I use and recommend is Gilly Stephenson’s cabinetmakers wax. It is a combination of beeswax and carnauba wax in a gum turpentine base. From my own experience I’ve found that beeswax, on its own, never thoroughly dries and can become sticky and attract dust, and carnauba wax, on its own is tough to work with. The cabinet makers wax from Gilly Stephenson ticks all the boxes for me as it is easy to use, polishes up beautifully, and is very realistically priced.

The method I use to apply it is detailed below.

Sand your workpiece up to 1200 or 1500 grit using the method described in “How to get the most from your Rotex, (Part 1)
Put your sander aside but don’t remove the sanding disc
Use a soft cotton cloth and apply a thin coat of the wax to the surface. Rub it evenly over the surface making sure there are no lumps of wax. Remember to only use a thin layer. You can apply more coats as you go Once the wax has been spread over the surface leave it aside for about ten minutes.

Now, the next stage is the enjoyable part.

Grab your Rotex and double check that it’s on speed 1 as well as in Rotex mode. Place the sander on the workpiece, turn it on, and slowly and steadily work over the entire surface of your project. The small amount of heat that your creating is sufficient to open the pore of the timber and let the wax in, while the 1500 grit abrasive smooths and distributes the wax evenly over the surface.

Don’t overwork the surface: just a few minutes should do it.

When you’ve finished this stage you need to grab a paper napkin; yes, you read it right, a paper napkin. When I was teaching for Festool, and I knew I had a sanding workshop coming up the first thing I’d do would be to head down to the local McDonald’s and grab a handful of their paper napkins.
So, now you’ve got your napkin, place it on the workpiece, then put your Rotex, (with the 1500 grit abrasive still on it), on top of it. Double check that you’re in Rotex mode and on speed 1.
You should begin to see the shine develop very quickly. The paper towel equates to about a 6000grit, (approx) abrasive and cuts back the surface beautifully.
You can repeat the process and add as many layers of wax as you like. The more layers you have, the more vibrant and lustrous the finish but I recommend that you leave at least 24 hours between applications.
Try this finishing method on some offcuts of a few different species of timber. By doing this, you’ll create a “library” of finished samples which can really add the ‘wow’ factor to any presentations you give to potential commission clients if the future. What it also does is give you more practice with the sander so you can become more familiar with, and refine your technique on the sander.

I hope this article helps you in working with your Rotex and achieving better finishes that you’d previously thought possible. As always, please post a comment or send me an email if you’ve got any questions.

Cheers,
Bryan.

Create a free website or blog at WordPress.com.

Up ↑