Hi Guys,
After the success of last weekends foray into Gothic Trammel routing, I had a bit of free time this weekend to further refine the technique. The purpose of this exercise is twofold, firstly to see how far you can go with trammel routing, and secondly to create and refine some different router techniques for a upcoming book.
Last week I made a Gothic Trefoil Frame so this week I decided to attempt a Gothic Quatrefoil motif.
I remembered to take the camera into the workshop this week, so I could document the process.
The first step is to prepare the panel. There is a process to this which i’ll cover in more detail in future articles
Once the panel is prepared, the next step is to draw the design using a compass and rulers.
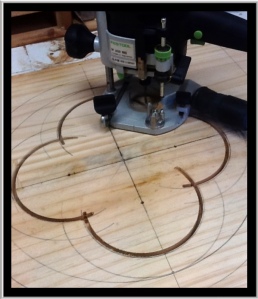
The next stage is to drill a small hole to accommodate the shaft of the trammel. the router and trammel are then placed on the workpiece and the plunge depth is set as per normal. I’m using 19 mm pine for this test piece but will only be cutting the design in 18mm deep, (it’ll make sense later) the inner line of the small circles are cut first and the position of the cutter is is determined by sighting the edge of the cutter to the pencil line.
Once your set carefully start cutting.
Cut each circle to the maximum depth before moving on to the next one. The trammel is visible in front of the router in the photo above.
Once you’ve completed the inner set, move out to the next set of rings taking care to stay within the design.
When you’ve done all the straight cuts, change to a face cutting profile bit and add some detail as I’ve done on this example.
The next step is to put a scroll cut blade on your jigsaw and carefully cut the frame from the panel.
Once thats done your piece will probably look like this
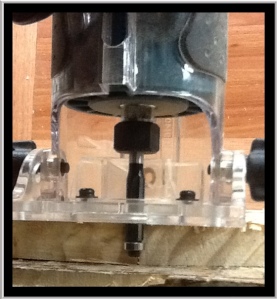
Dont stress, we now turn the frame over and put a bearing guided flush trim cutter in your router or trimmer, and set it as shown below
Carefully trim all edges and you’ll hopefully end up with something that resembles this,
Now all it needs is a good sand and finish according to your taste.
Ok guys, thats all for this post, they’ll be more on this topic in following posts leading up to my routing book which will hopefully be ready in the next few months
As always, your comments and questions are appreciated.
Be safe and have fun,
Cheers
Bryan.


that is awesome! your tutorial makes it look so easy! I may have to give this a try on a rainy day…or at least one that is cooler where I can work in the garage 🙂
This is one extremely fascinating post. I like the way you write and I will bookmark your blog to my favorites. 260595
Just found your site via stusshed.
A great tutorial looks easy as………hmmm look forward to more. I have added your site to my RSS feeds
Hey! I’m at work browsing your blog from my new iphone 3gs!
Just wanted to say I love reading your blog and look forward to all
your posts! Keep up the superb work!