Setting Up The Workshop

As the commercial furniture market becomes saturated with mass-produced pedestrian objects, more and more people are exploring the option of designing and making their own unique pieces. The first question that is often asked is, “what tools do I need?”.

As a power tool trainer and specialist tool salesman for over ten years, my advice is to buy the tools as you need them for a particular project and when you decide on a plan, look at the tools you will need to perform each of the stages of the build. Generally, there are five stages of any project, and you need to have one or two tools from each group to make the piece. The stages are: dimensioning, cutting, joining, detailing, and finishing. Let’s look at each step individually.

*Dimensioning *: The first part of this stage involves transitioning the timber from the milled slab or board size to the size you need for the project. Power tools for this stage include both table saws and handheld electric saws, as well as band saws. Traditional tools for this stage include panel or carpenters saws as well as bow saws.

The second part of dimensioning involves dressing the timber to ensure a flat smooth and most importantly square surface so you can accurately cut and join the various components of the workpiece. Power tools for this stage include thicknessers, jointers, and drum sanders, while a variety of hand planes are generally used to complete this stage in a traditional build.

*Cutting:* When cutting board stock rather than sheet material, the most commonly used power tool to achieve this stage is the slide compound mitre saw. While you can complete this stage with a handheld circular saw it is a lot easier and safer to use a mitre saw. If your project contains sheet material components such as plywood or particle board, you’ll need to use either a circular saw or a table saw. If you’re following the traditional path, then a right quality panel saw and tenon saw would be your preferred tools.

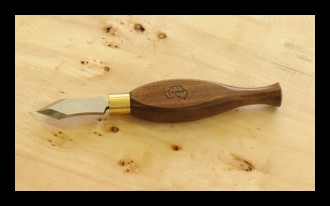
*Joining:* The joinery stage involves the assembly of the various components of the project to achieve its close to finished form. If you want to use power tools at this stage you’ll need a cordless or corded drill, which will enable you to use things like pocket hole jigs or dowelling jigs; otherwise, tools such as biscuit or domino joiners allow you to complete a successful joint. The hand tool path is more complicated at this stage and calls for the use of hand saws and chisels to cut mortice and tenon or dovetail joints. While more complex this is a technique that is well and truly worth learning as it will raise the overall standard of our pieces to a much higher level.

*Detailing:* The detailing stage of the build is where you add ornamentation such as round overs, bevels or inlays to the edges of the piece to enhance the overall design. If you’re building using power tools the primary tool you’ll need is a router which, with the correct cutters will enable you to create a variety of decorative treatments. In the traditional build, you’ll need a router plane or a selection of moulding planes as well as a variety of chisels and scrapers.

*Finishing:* The finishing stage is the final part of the build where the surfaces are fully sanded before the application of the lacquer or varnish. The most commonly used power tool for this stage is the random orbital sander. Often available in either 4 inches, (125mm) or 6 inches, (150mm), a variable speed random orbital sander will become one of the most regularly used tools in your workshop. If you’re following a traditional build, you’ll need a sanding block and a range of sanding sheets ranging from 80 grit to 1000g grit to hand sand the surface to a satisfactory finish.

When you’re buying tools, either power or hand, always try to get the best tool you can for the budget you have.  If you need to get some savings somewhere, I would forgo purchasing a thicknesser initially as most timber yards will cut timber and dress it to size for you for a minimal cost.

As usual your questions and comments are appreciated

Cheers,

Bryan

Calibrating The TS55R Blade

Five Minutes With Festool – The TS55

Let’s assume that we’ve just had a blade sharpened and we need to check the calibration between the cutting depth and the depth scale. Remember that when a  saw blade is sharpened, you invariably lose a small amount of the blade diameter. After one sharpen it may not be noticeable, but after two or three sharpens there can be a  variation in your cutting depth.

 This method can also be used to fine tune the cutting depth if you’re using the saw on a different brand of guide rail, (not that I’d recommend that), as there can be a variation in the standard 5mm thickness between brands. 

To calibrate the blade on a TS55R, place the base of the saw on a piece of paper (A4 copy paper is ideal), on a  flat, smooth surface and set the depth guide to zero. As we’re not on the guide rail make sure you use the unmarked indicator rather than the FS indicator.

Set To Zero
Depth Gauge set to zero. Note the blade calibration knob to the right of the FS mark.
plunged
Fully Plunged, note the plunge stop resting on the calibration knob.

Once set, gently plunge the saw down until it stops and look to see if the tips of the blade are touching the paper

Blade too high
Blade too high

Adjust by turning the calibration knob on the top of the saw until the tips of the blade just touch the piece of paper and you’re done.

Blade Set
Blade set correctly


A good habit to get into is to periodically check this to make sure that your TS55 is working at its best at all times. 

I hope you found this “Five minutes with Festool” useful and as always your questions and comments are appreciated.

Have fun and be safe,

Cheers

Bryan

Festool, technique, training, TS55R, cool tools, blades, woodwork, power tools,

The General Digital Sliding T-Bevel.

Hi All,

One of the projects that I’ve been putting a lot of time into recently is a book on pushing  the boundaries on router trammel work so you can create pieces such as the Septafoil frame shown below.

(Please keep in mind the frame in the photo is a draft piece cut out  of a 25mm thick MDF sheet and was created to test the process i’ve developed. The next one will be in hardwood)

Septafoil Blog

The frame is trammel routed using the Festool MFS routing template long with my trusty Festool OF1010 router.

Frames like this are an exercise in geometry and begin as a design on my sketchpad which is where I create the form, and work out the angles and measurements so I can transfer them to my full size panel.

A couple of months ago I discovered the General Digital sliding T bevel and since then my design work has moved forward in leaps and bounds.

I use the general to set angles in sketches, to assess how a variation in angle changes the structure I’m developing and when I’m happy with a design, to quickly and accurately transfer the design onto a panel.

Please take the time to watch the video here which shows more applications for this awesome tool.

The General has four buttons next to the digital display which you use to operate the tool.

They are;

Power, the red one.

Zero, to zero the tool for use

Hold Flip, which either lock the current measurement on the display or flips the display so you don’t have to look at it upside down.

Reverse, Which changes the display from an reflex angle , (between 180 and 360 degrees) to a an acute angle.


General 2_edited-1

All in all this is one of the most  useful tools I’ve come across recently and I am certain you’ll find it a worth addition to your toolbox.

Want one – Click here

As always, your questions and comments are appreciated.

Be safe and have fun.

Cheers

Bryan

ETS EC 150 Festool Brushless Sanders

Hi All,

Recently released in Europe Festool’s new  sanders the ETS EC 150/5 and ETS 150/3 are sure to be a hit when they reach the Australian market. With the latest in EC brushless motors these sanders have a host of new features to make the onerous task of sanding quicker and easier.

images

Some of the new features are a vibration sensor which automatically adjusts the sander speed when not under load to protect the user from excess vibration, constant speed under load, and a suction detection system which stops the sander if the dust extractor hose comes out, (this feature can be deactivated if you’re using a dust bag).

The new sanders have a height of 113mm including pad, compared to 185mm on the old ETS sanders and a weight of 1.2 kg which is 600 grams lighter than the old ETS sanders

Have a look at the video below to see the ETS EC 150 in action and watch for a cameo appearance by Blair, one of the principals  of Festool Australia

Please watch this space and as more information comes to hand I’ll post it here

Be safe and have fun

Cheers

Bryan

The Profi Scale Moisture Meter

Moisture 2 Hi All,

Sadly,  I had a death in the tool box last week. after one too many drops, my old moisture meter finally gave up.

So after a suitable period of mourning, (about 12 seconds) I decided to update to to the new Profi scale moisture meters by Burg Wachter that arrived in the shop last week.


Whats cool about these meters is that as well as measuring the moisture level of wood you can quickly change the settings so you can measure the moisture content of plasterboard, (drywall) screed and gypsum as well as ambient temperature in Celsius and Fahrenheit.

The tech specs for the moisture meter is shown here:

Technical data

Measurement range Wood: 4 – 60 %Moist 3
Solid materials: 0.2 – 3.0 %
Resolution Wood: 1 %
Solid materials: 0.1 %
Accuracy Wood: < 30 %: ± 2 % ≥ 30 %: ± 4 %
Solid materials: < 1.4 %: ± 0.1 %
≥ 1.4 %: ± 0.2 %
Power supply 4 × 1.5 V (e. g. LR44)
Optimum ambient conditions 0 °C – 40 °C, air humidity: < 85 %
Storage temperature -10 °C – 50 °C,
air humidity: < 85 %


When I use a  moisture meter I’ll always  take  a number of readings from different points on the timber then work out an average. The meter was simple to use moisture 1and  when I measured the same point in the
timber 4 times I got the same read every time, ( unlike my old meter)

Also in the manual is this handy table which give you a rough idea of how to interpret the data from the meter.

Humidity content in weight percent
Humidity status Wood        Screed, gypsum, plaster
Inoffensive 2 – 15 %              0,2 – 0,3 %
Borderline 15 – 19 %            0,4 – 0,9 %
Too humid > 20 % > 1,0 %

Please keep in  mind when using this scale that it’s only a general idea. Moisture content varies between species and where you are in the world. Remember to take multiple readings and work out an average.

What I also love about this meter is the size, (See photo below), and the price.

moisture 4At under $40.00 (AUD) its an absolute bargain for all the features it has. If you’re in the market for a new meter have a look here.

Thats all for now guys, as always be safe and have fun,

Cheers

Bryan


The Festool Vectro OS 400

Vectro 1
Hi Guys
Another new Festool product came to my attention today. The OS400 Vectro is an oscillating tool which looks to me to be modelled after the Fein Supercut. I must admit that this one caught me by surprise and I’m intrigued to see this tool and see how it compares to the Fein Multimaster and Supercut range. The marketplace for this type of tool is pretty crowded but i’m sure that having “Festool” stamped on the side will drive sales.

At present I have no further info as to release dates, price and English Info or videos. The Product pdf which you can view here ( VECTURO)  comes from the Leza tool company in Belgium.

I’ll investigate further and post any further updates as they come to hand.

As always, be safe and have fun.

Cheers

Bryan

The Works Of Chris Vesper

chris 1JPG

Hi All

As a woodworker for over 20 years I, as many of us do, have an appreciation of finely made hand tools. They seem to make a job flow a bit  easier and a quality tool feels “right” in your hands. About six years ago during my time at Festool I had the chance to get to know an up and coming toolmaker by the name of Chris Vesper. Over the  next few years and countless working with wood shows I came to know Chris fairly well and purchased a number of tools from him which I used in the training sessions I ran for Festool.

My undoubted favourite would have to be the sliding bevel ( pictured) which still sees regular use most weekends setting out dovetails.

After I left Festool lost touch with Chris but caught up with him again at this years Working with Wood show. It was great to see that Chris’s range is still expanding and his reputation as a quality toolmaker is still growing.

pwm1213_250 (1)I was delighted to see a feature length article on Chris in the December 2013 issue of Popular Woodworking magazine which was written by the hand tool maestro Christopher Schwarz, of “Lost Art Press” fame.  It’s outstanding to see a local Aussie toolmaker featured in an international magazine of this standing. 

You can see more of the tools made by Chris on his Vesper Tools website.  Please keep Chris in mind if you need to update your layout tools and lets support Australian made tools.

As always, be safe and have fun

Cheers

Bryan

chris aaa2 chris bbbb1

The Protool CSP 132

20130619-064511.jpg

Hi All,

The beastie in the photo is the Protool CSP 132 Carpentry circular Saw and if you’ve ever got the need to cut timber up to 130 mm thick, this is the tool for you.

I had the opportunity to get in one of these massive saws for for one of my regular customers last week, so as it’s really uncommon, I took the opportunity to grab a couple of pictures to show you all.

The specs for the saw are:

Cutting depth 50-132 mm
Rated input 2300 W
Saw blade diameter 350 x 30/3,5 mm
Mitre cutting 0-60 °
Rated Speed (no-load) 2200 min-1
weight 18 kg

20130619-065212.jpg

Whilst it’s not the tool for everyone you have to admit that it falls into the ” really cool tool category”.

Contact me if you want any more information about this or any other tools.

As always, be safe and have fun.

Cheers,

Bryan

Festool Hand Sanding Pad


Hand sanding pad

For those occasions when an electric sander is too aggressive or when you’re sanding delicate materials such as small mouldings, the hand sanding pad, (Festool part # 495966) is an absolute gem.

The pad features a Velcro backing which wraps around the piece and easily accepts all styles of 150mm diameter abrasives. I’ve teamed it up with the new series of Granat papers to sand small timber mouldings up to 1500 grit for a project I’m working on and have been extremely satisfied with the results to date.

Available as either a hard or soft pad and selling for under $40.00 they’re a worthwhile addition to your sanding kit.

As always, your questions and comments are appreciated

Be safe and have fun,

Cheers

Bryan

TS55R & CMS Module

Hi Guys


Todays post is all about the new CMS module for the TS55R plunge saw. For those of you who aren’t familiar with the CMS system, it is in essence a Triton workcentre on steroids.

It offers a really accurate and easy to use module for the TS55R saw, a module for the PS300, 400, and hopefully PS420, jigsaws, a linisher module and possible the most outstanding router table on the market today, the CMS-OF, which fits all of Festool’s routers. though, my personal favourite is to use it with the OF 2200.

Please watch below to see the Wood Whisper’s video review on the CMS router table.

I had fun with the CMS TS55R unit but must admit to being a bit perplexed by the lack of clear assembly instructions and the inclusion of components from the old CMS TS55 Module

Please click here, (CMS TS55R) to read my full article.

As always, your questions and comments are appreciated.

Be safe and have fun

Cheers

Bryan

Blog at WordPress.com.

Up ↑