Festool Sale Day, Getting Ready

Well, after a full on day we’re ready for the Festool sale days on tomorrow and saturday.

What I know so far is that the TS55 will be $898 with 2 guide rails and a bay, CT26 $955 with a free box of bags, 20% discount on all accessories and a further 5 % off our already discounted prices except for those products listed as Nett Lines.
Remember that the boys from Festool will be on hand to help with your questions and to demo these outstanding tools

Image

A small selection of the stock we have to sell.

Anyway Guys, it should be a good couple of days so I hope to see you there.

Cheers

Bryan

20130502-211811.jpg

The balloon boys!!!!!!!!

Festool Sale Days

20130502-064226.jpg

Hi All,

Well it’s that time of year again and down at Just Tools were getting ready for our annual two day Festool Sale.

As always there will be bargains and the Festool reps will be on site to demonstrate the tools and hopefully answer any questions.

I’ll be around the whole time so be sure to come over and say hello,

As always, be safe and have fun

Cheers

Bryan

Just Tools are at 180 Clarendon Street Sth Melbourne Vic

Sale Times

Friday 3/5 10 am to 5 pm
Saturday 4/5 8.30 am to 1 pm

Waxing Painted Timber Surfaces

20130302-140934.jpg

Waxing Painted timber surfaces

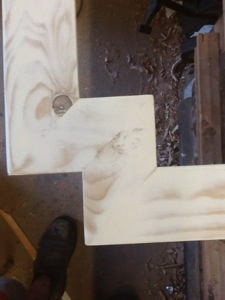
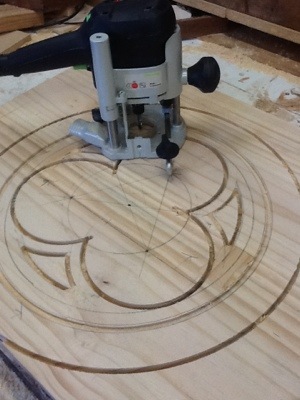
I recently completed a notice board for my daughter to hang her copious amounts of drawings and general tweenage girl stuff. The board is big, measuring around 1 metre by 1 metre and features offset corners for a bit of added interest.
I knew from the beginning that the piece would end up being painted so instead of using stock from the premium rack I had a fossick and ended making the noticeboard frame from some long offcuts of 90 x 35 framing pine that I had in the workshop. The idea of using bog standard timber to create a high-end decorative piece has always intrigued me, and I was looking forward to the challenge of seeing how good I could make this pedestrian timber end up looking.
When the frame was complete I filled all the imperfections and sanded the entire frame up to 1500 grit. I used the interface pad described in part 1 to ensure that I didn’t flatten any of the rounded edges on the piece.

When all the sanding was complete, I gave the entire frame its first coat of paint. The paint I used was the leftover acrylic matt ceiling paint that I used when painting my daughter’s room. The colour was tinted to a light ivory tone which gave the piece a nice warm feel.

You may be wondering why I used matt paint? Well, firstly, I had it, and I suppose I was being a bit of a cheapskate and didn’t want to buy more paint and secondly, the flat surface of the paint provided an excellent key for the wax finish.

When the first coat had had a full 24 hrs drying time I gave it a sand with 800g Vlies abrasive to de-nib the surface and prepare it for the next layer. It is important to sand slowly with minimal pressure and had the sander set to speed 1 in the Rotex mode. We need to avoid building excess heat which can affect the paint surface.
I always use Vlies during this stage of the process as it is a soft abrasive which minimises the risk of sanding through the paint surface and it gives a beautiful finish.
Clean off any excess dust then repeat the process until you’ve got at least 4 coats of paint on the frame.
When the final coat of paint is dry, sand the entire surface with 1500 grit Titan remembering to use an interface pad if required.
Wipe all surfaces to remove excess dust, then grab your can of Gilly Stephenson’s cabinet makers wax and use a soft, clean cloth to apply a thin coat to one side of the frame. Do one side at a time to ensure that the wax doesn’t set or get sticky. Put a sheet of 1500 grit Titan paper on the sander and on speed 1 in the Rotex mode, begin to gradually work the wax into the paint surface. Once the first side is done repeat the process with each of the sides until the frame is done. When you’ve completed this stage place a paper napkin on the surface then, place your sander on it and with speed set to 1, in Rotex mode, burnish the entire furnace of the piece.
The wax burnishing process described above is taken from my earlier article, “How to get the most from your Rotex” and is an excellent method to achieve a high-grade wax finish.
I’ve recently been experimenting with the white ‘Vlies’ pads which are an excellent substitute for the paper towel. While the paper towel method is certainly cheaper, still, suggest you get one or two from your local Festool dealer and try them out for yourself.

Repeat the process to build up the finish until you’ve either had enough or have reached a level of finish you like. For my work, I find that around 3 to 4 coats are sufficient but see hoe you go and stop when you’re happy with the finish.

There’s a lot of scope for experimentation with this finish so don’t be afraid to play!!

As always, thanks for reading, be safe and have fun.

Cheers

Bryan

20130302-141405.jpg

20130302-141023.jpg

20130302-141204.jpg

Festool Hand Sanding Pad


Hand sanding pad

For those occasions when an electric sander is too aggressive or when you’re sanding delicate materials such as small mouldings, the hand sanding pad, (Festool part # 495966) is an absolute gem.

The pad features a Velcro backing which wraps around the piece and easily accepts all styles of 150mm diameter abrasives. I’ve teamed it up with the new series of Granat papers to sand small timber mouldings up to 1500 grit for a project I’m working on and have been extremely satisfied with the results to date.

Available as either a hard or soft pad and selling for under $40.00 they’re a worthwhile addition to your sanding kit.

As always, your questions and comments are appreciated

Be safe and have fun,

Cheers

Bryan

When the Kapex Attacks

BEWARE THE PLASTIC STRAPPING

Hi Guys,
Had a bit of a problem with a Kapex today. Not with the saw itself but with the bloody packaging.
My first sale of the day was a KS120 to a new customer and while helping him put it into his car he gave the box an unexpected twist which caused my finger to slide under the plastic strapping and before I could do anything I had dislocated the top joint of the ring finger on my left hand.
My customer didn’t notice so once he was on his way I popped the joint back into place and headed off to the emergency department of the local hospital. I ended up snapping the tendon as well as damaging a few muscles so I’m looking at 10 weeks in a cast.

Bugger

My advice to you all is beware the box, and those bloody black plastic straps. They’ll get you when you least expect it!!!!!!!

Cheers

Bryan

http://www.tutorwood.com

20121109-205646.jpg

Rotex + Granat + Marble = Wow

Hi Guys,

festool granat abrasive

I apologise for it being quite a while since I updated the site, but I’ve been busy behind the scenes working on an upcoming book on trammel routing and an E-book on the Rotex. Today’s post is all about the new Festool Paper “Granat” which would have hit the shelves at your local Festool dealer a few months ago.  I hadn’t had a lot of time to test it until an opportunity presented itself recently where a client of mine had a problem with some marble that needed some love and Granat proved the perfect solution.

Read the full article with the technique on how to polish stone with Granat here.

This new hybrid abrasive is impressive and I’ve found that it lasts nearly twice as long as Brilliant and Rubin on timber, Corian and stone.

Have a read and let me know what you think.

As usual, your questions and comments are appreciated.


Be safe and have fun,

Cheers

Bryan


The New TS55R is here!

Hi All,

Well the new TS55R is here and I’ve finally had a chance to have a bit of a play with one. Mechanically, it’s the same as the old TS55 with no changes to either the motor size or electronic components.

20120806-063427.jpg

The major changes are to the body of the saw with the new flat side design enabling you to cut within 12mm of a wall, or, by laying the saw on its side you easily and quickly undercut skirting boards and door frames to allow for floating floors.

You’ll also notice the change to the riving knife with the new rounded tip fitting into the saw cut more easily. The riving knife is also now in a sealed compartment of its own so you don’t have to worry about it getting clogged with swarf.

There is now a clear viewing port at the front of the blade so you can clearly see where you’re cutting. The clear port is removed and replaced with the newly designed splinter guard for splinter free offcuts.

20120806-064328.jpg

The measuring scale has been completely revised with a dual scale and pointer showing the cutting depth both with,(FS), and without the guide rail.

The black knob to the right of the scale is another new feature. It’s use to calibrate the blade depth. When you put a re-sharpened blade blade on the saw, set the scale to zero and plunge the saw, (without the power on), then turn the turn the knob until the tip of the place touches the work surface.

One important point to remember with the new TS55R is that owing to the body changes it will no longer fit the CMS saw table. There is a new plate on the way as well as an adapter kit to retrofit existing CMS, TS55 modules.

I’ll post more info as it comes to hand.

That’s all for now, remember to be safe and have fun.

Cheers

Bryan

20120806-065212.jpg

Festool Domino DF 700

Hi All

For those readers who have either purchased or are contemplating the purchase of the new Festool Domino DF 700, I’d highly recommend that you click here, to download the supplamental manual for this awesome machine.

The manual, which was commissioned by Festool USA offers a clear and concise overview of the  DF700  and will make it a lot easier to understand all the functions of the machine.

Hope you enjoy and as always, your questions and comments are appreciated

Be safe and have fun,

Cheers,

Bryan

The OF 1010, Trammel Routing

Hi Guys,

I just thought I’d post a few photos from an upcoming e-book that I’m working on. Covering all aspects of the Festool OF1010, it also will include specialist sections on template work and trammel routing. The attached photos will give you an idea of some of the things you do with the 1010.

20120701-190601.jpg

20120701-190709.jpg

20120701-190809.jpg

20120701-190833.jpg

The frame is made from a pine panel which I had left over from another project was made with an OF1010 with a Festool trammel accessory

20120701-191309.jpg

I’d love to know what you think so please feel free to post a comment or drop me an email.

As usual, be safe and have fun.

Cheers

Bryan

Protool PDP 20-4, New Video

Hi Guys,

The new Protool PDP 20-4 is on the way so please have a look at this new video on this outstanding tool which has been uploaded today by a Protool user in Russia

There’s no accompanying dialog and the production values aren’t fabulous but this will give you a really good idea of what this tool can do and the accessories that form part of the system

Please enjoy and let me know what you think.

As soon as I get a firm release date I let you all know.

As always, be safe and have fun

Cheers

Bryan

Create a free website or blog at WordPress.com.

Up ↑